- Kampanj!
- −20%
- Slut i Lager


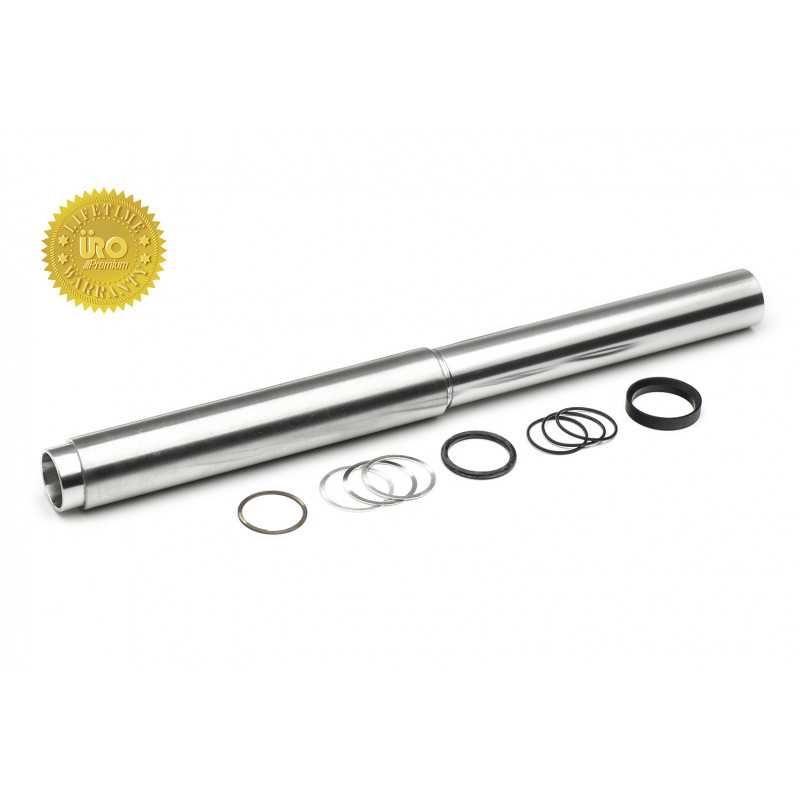
The URO Parts designed water pipe collapses allowing the same repair to be complete without removing the timing cover, saving thousands in labor costs and many hours of down time.
Engine Coolant Pipe Front URO Parts 11141439975PRM
Installation video:
https://www.youtube.com/watch?v=zRzOjiZqmIc
Vehicle Max Qty: 1
Applications:
BMW 545i 04-05, 550i 06-10, 645Ci 04, 645Ci 04, 645Ci 05, 645Ci 05, 650i 06, 650i 06, 650i 06, 650i 07, 650i 07, 650i 07, 650i 08, 650i 08, 650i 08, 650i 09, 650i 09, 650i 09, 650i 10, 650i 10, 650i 10, 745Li 02-05, 745i 02-05, 750Li 06-08, 750i 06-08, Alpina B7 07-08, X5 04, X5 04, X5 05, X5 05, X5 06, X5 06, X5 07-08, X5 09-10
Interchanges:
11147507278, 11511439976, 11517507717, 11517508535, 11617521181
** 2017 Update ** The rear end of the pipe is now manufactured with an angled shoulder, which eliminates the need for the angled white plastic spacer (blurred out in this video). This video illustrates the installation of URO Parts Coolant Transfer Feed Pipe 11141439975-PRM in the BMW N62 V8 engine. (For N63 V12 engine, see kit 11147500355-PRM.) The pipe installs in the intake valley, eliminating the costly repairs associated with replacing the one-piece factory pipe. The simplicity and quality of this design is unsurpassed. Late model BMW V8 models fitted with the N62 engine can suffer from a failure of the front seal of the water transfer feed pipe located under the intake valley pan gasket. The original bonded seal fails primarily due to corrosion caused by an electro-chemical reaction between the materials over time. Symptoms will be a coolant leak coming from the 5mm weep hole in the front timing cover of the engine and eventual loss of coolant and over heating. The factory design is a long tube which can only be fitted from the front of the engine with the timing cover removed; a job that can cost upwards of $10,000 and take over 20 hours of shop time. The URO Parts designed water pipe collapses allowing the same repair to be complete without removing the timing cover, saving thousands in labor costs and many hours of down time. BMW Water Tube Kit Contents: #1 Front Inner Water Tube (qty 1) #2 Rear Outer Water Tube (qty 1) #4 Rear Packing Shims 0.020” (nylon) (qty 3) #5 Inner Tube O-Ring Seals (qty 3) #6 Rubber Grease Packet (qty 1) #7 Spirolox Locking Ring (qty 1) #8 Front Tube Seal (qty 1) #9 Rear Tube O-Ring Seal (qty 1) - *This has been updated to a high quality square seal for easier installation Additional BMW Factory Parts Recommended: *(This is a list of other items that will be required for completion of the water tube Installation) Qty 1 11 14 7 507 278 intake valley pan / gasket Qty 2 11 61 7 521 181 intake manifold gasket Qty 1 11 51 7 508 535 water pump gasket Qty 1 11 51 7 507 717 water pump o-ring Qty 1 11 51 1 439 976 water return pipe *Note: other miscellaneous parts may require replacing based on the tear down necessary to access water pipe. See factory workshop manual for suggested parts listing. A trained technician following the factory workshop manual and repair procedures is necessary to properly complete this repair. After draining the cooling system, remove the intake manifold and other related components to expose the intake valley pan. Remove the intake pan so the factory 1 piece coolant pipe will now be exposed. The existing pipe can now be cut in the center with a small air saw or cut off wheel. Remove the factory pipe in 2 pieces. The front will require some twisting or careful prying to break the bond of the front seal. Remove the remaining front seal material with a pick and wire brush taking care not to damage the seal housing and review the area visually. Remove the old rear o-ring seal taking the same care. Carefully clean the front seal gallery. Lubricate all surfaces of the front seal liberally with the grease provided in the kit. Fully fit front seal (item#8) into housing taking care to make sure the *flat profile of the seal faces the timing cover (forward). (*this is critical to a proper installation). Perform the same lubricating and fitting operation to the rear o-ring; noting however there is no orientation necessary for this seal. Fit the 3 supplied inner tube o-rings (item #5) carefully to the front tube section so each is fully seated into the machined grooves on the tube; lubricate with provided grease. Fit inner and outer tube (item #2) sections together taking care not to pinch or damage any of the pipe sealing rings & collapse completely. Then install the spirolox (item #7)around the smaller inner tube and position it by sliding it up against the end of the larger outer tube. Taking the assembled and collapsed pipe grease the front tube (smaller diameter pipe) and fit squarely into the front seal taking great care not to pinch or damage it. With a soft faced pry tool, lever the tube forward until it stops against the timing cover. Lubricate the end of the larger outside tube with grease provided. Grabbing both sections of the tube firmly, hold the front half in place and slide the rear section back into the block until it clicks home, being sure to rotate the tube so that the angled shoulder of the pipe matches the angle of the block. This should just expose the ring groove allowing the pre-installed locking ring to be slid forward into place. If after fully seating the tube into the block the snap ring grove is beyond the end of the rear tube half, installation of shims will be required. Casting variations during block manufacturing may make this simple procedure necessary.
Särskilda referenser